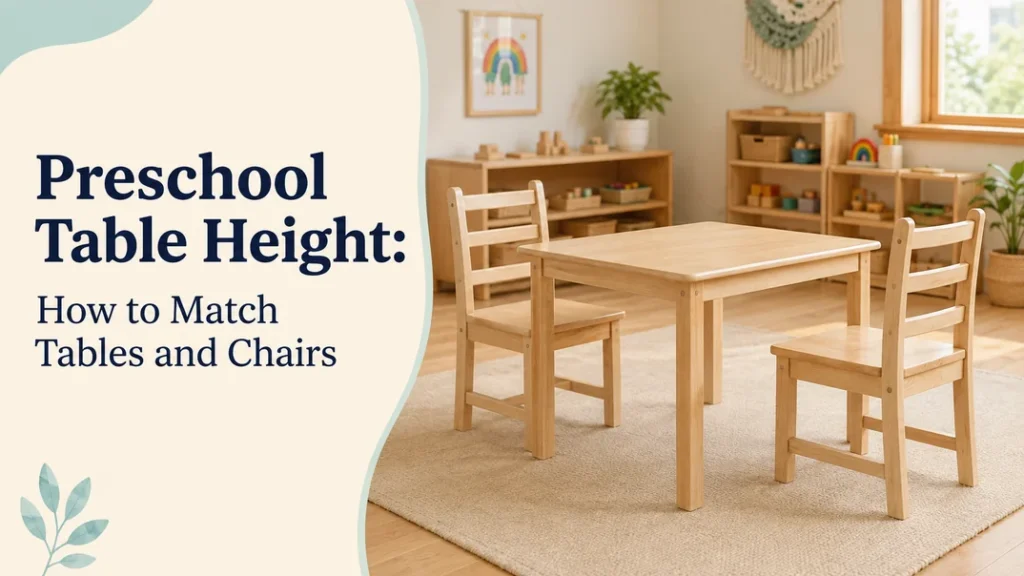
Preschool table height depends on the complete pairing, but many preschool groups can start by screening a tabletop around 18–20 inches (46–51 cm) with a chair seat around 10–12 inches (25–30 cm). The final fit depends on the child’s feet, elbow position, and clear space under the tabletop, so test the complete table-and-chair set before ordering.
Preschool Table And Chair Height Chart
The bold range above is a starting point, not a fixed rule. The table below shows broader tabletop and seat-height combinations we commonly manufacture and supply for preschool and early-learning projects. It is provided as a practical reference, not a universal age standard: the same age band may include several table heights. Use it to build a shortlist, then test the actual children, activity, chair, and finished product before approval.
Use the table height and chair seat height together. The distance from the seat to the tabletop is only a planning point: an apron, drawer, shelf, or crossbar can reduce usable knee space. Measure finished dimensions from the floor and check the complete pairing before approval.
As an independent external reference, a Wisconsin child-care licensing commentary recommends a chair seat about 10 inches below the tabletop (Wisconsin Department of Children and Families).
| Tabletop Height (cm / in) | Age Label in the Guide | Seat Height (cm / in) |
|---|---|---|
| 36 cm / 14.2 in | 12–24 months | 20 cm / 7.9 in |
| 38 cm / 15.0 in | 18–36 months | 20–25 cm / 7.9–9.8 in |
| 41 cm / 16.1 in | 2–3 years | 20–25 cm / 7.9–9.8 in |
| 43 cm / 16.9 in | 2–3 years | 20–28 cm / 7.9–11.0 in |
| 46 cm / 18.1 in | 2–3 years | 20–30 cm / 7.9–11.8 in |
| 48 cm / 18.9 in | 2–3 years | 23–33 cm / 9.1–13.0 in |
| 51 cm / 20.1 in | 4–5 years | 25–33 cm / 9.8–13.0 in |
| 53 cm / 20.9 in | 4–5 years | 25–33 cm / 9.8–13.0 in |
| 56 cm / 22.0 in | 4–5 years | 28–33 cm / 11.0–13.0 in |
| 58 cm / 22.8 in | 4–5 years | 28–33 cm / 11.0–13.0 in |
| 61 cm / 24.0 in | 6–8 years | 33 cm / 13.0 in |
How to Match The Table And Chair Height
After shortlisting a table height, test it with the chair and activity you plan to use. Check that the child’s feet are supported, knees are comfortably bent, and hips stay back with the back supported. Then run a typical classroom activity and note where the pairing stops working.
Check Feet, Knees, And Seat Depth
Set the chair first. The child’s bottom should reach the back of the seat, both feet should be supported, and the knees should bend without pressure behind them. Leave a small gap behind the knees and check seat depth as well as seat height. If the feet dangle or the seat is too deep, change the chair before raising the table.
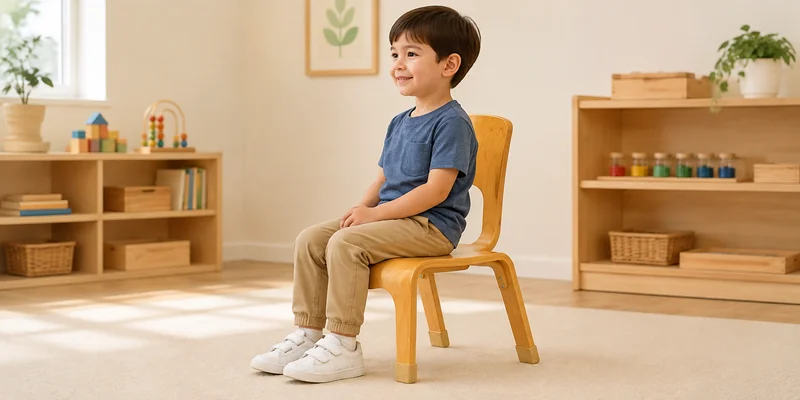
A chair that fails this check should not be corrected by raising the table.
Check Elbow Position during A Real Activity
Place the chair close to the table and use a familiar drawing, writing, practical-life, or sensory activity. The child should reach the work without lifting the shoulders or leaning heavily forward. Watch whether the child can return materials without stretching or standing; repeated leaning or standing is a reason to change the pairing.
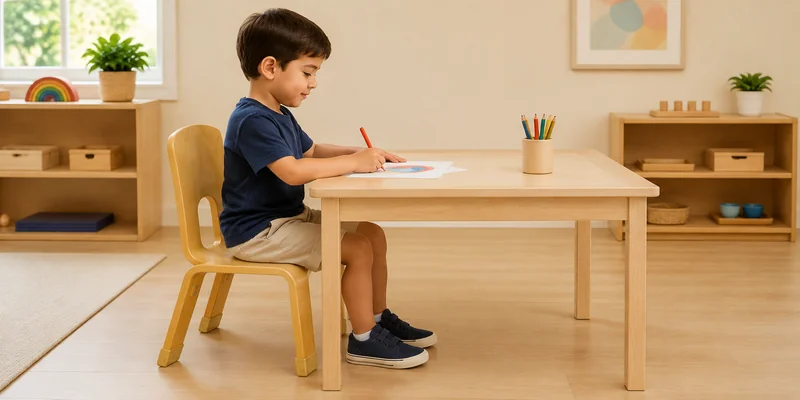
IL Bedfordshire and Luton children’s occupational therapy guidance recommends a supported working position: the child’s bottom is at the back of the chair, the back is supported, the feet are flat on the floor (or a stable footrest), and the tabletop is at elbow height. Use this checklist during a real drawing or writing activity, then repeat it with children at the smaller and taller ends of the group.
Check Legroom under The Table
Look from the side with the chair in its working position. Check thighs, knees, feet, and chair arms against the apron, drawer, shelf, crossbar, and legs. Repeat the check at every intended seat because a corner leg or a drawer can block one position while another remains open. A table can meet its stated height and still fail this legroom check.
The comparison below shows why the same finished tabletop height can still leave a child with different usable legroom.
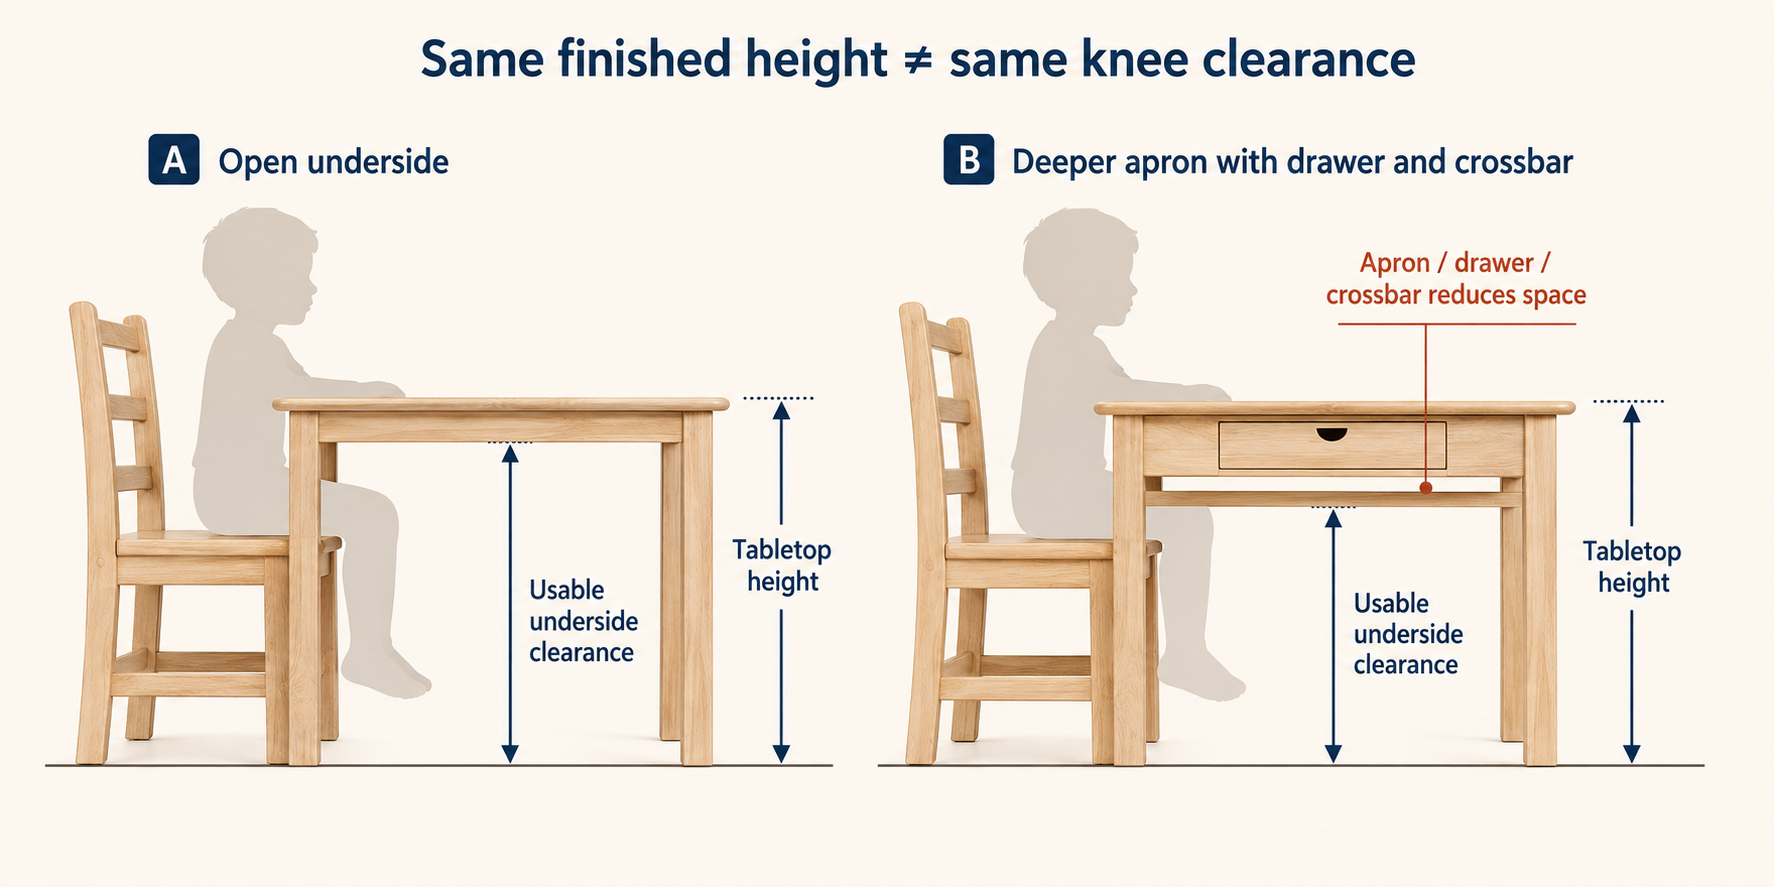
Two tables can have the same finished tabletop height and still give a child different legroom. A thick tabletop, apron, drawer, shelf, crossbar, or caster can lower the usable opening. Check the clear space under the top before you approve a table, not only the height printed in a catalog.
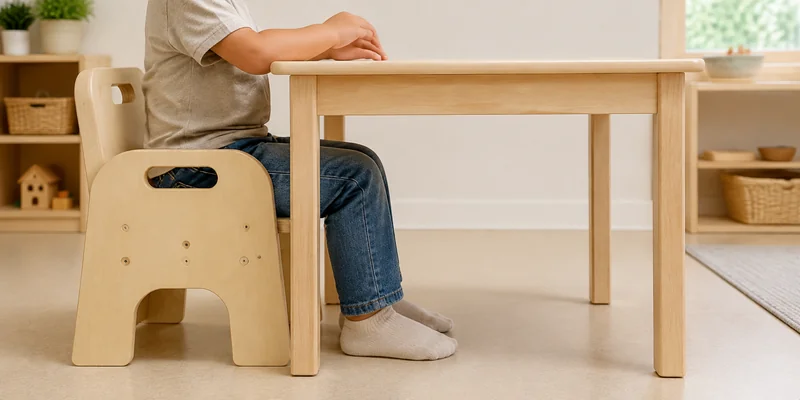
If you cannot inspect a sample, request a dimensioned drawing that shows the tabletop, underside, and chair measurements. A product photo can show construction, but it cannot prove the usable opening.
Choose Fixed Or Adjustable Height
Once a pairing passes these three checks, choose the table format based on how stable the room’s users and layout are. Fixed-height tables are usually the simpler choice when one tested pairing will serve a stable group. Adjustable tables are more useful when ages vary, enrollment changes, or one table must serve more than one room. The sections below show what to confirm for each option.
When Fixed-Height Tables Make Sense
Choose a fixed-height table when one tested table-and-chair pairing can serve a stable group.
Vantaggi
- Simple to specify: record the finished tabletop height and the matching chair seat height.
- Simple to set up: there is no height setting or leg lock to adjust after installation.
- Consistent for a stable room: the approved pairing stays the same for the group and activity.
Limitations
- Limited flexibility: one finished height cannot adapt when children, enrollment, or room use changes.
- More than one size may be needed: a mixed-age project may require separate table-and-chair pairings.
- A wrong pairing is harder to correct: changing the fit may require a different table or chair rather than a quick height adjustment.
A supplier catalog may list separate fixed versions such as 45, 50, and 55 cm; treat those as product options, not as a universal preschool standard. You can review available shapes, chair styles, and height configurations on the preschool tables and chairs page after you have identified the sizes to trial.
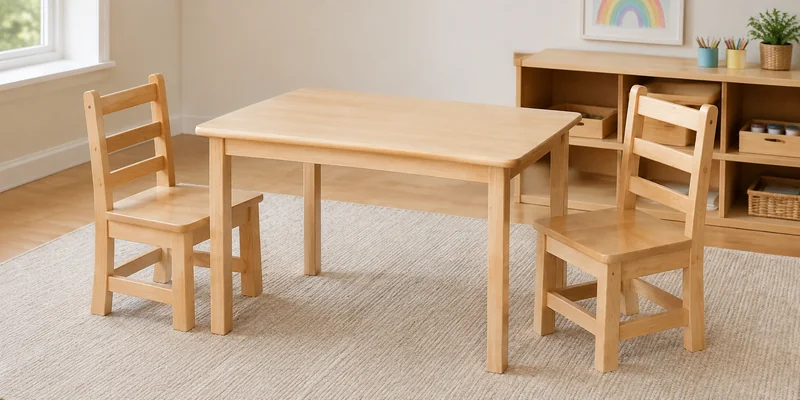
When Adjustable Tables Are The Better Choice
Choose an adjustable table when children vary in size, enrollment changes, or one table must serve more than one room.
Vantaggi
- More usable range: one frame can cover several tested tabletop heights when its range is sufficient.
- Easier to adapt: staff can change the setting when the room’s group or use changes.
- Useful for mixed-age planning: one table may support more than one tested pairing instead of being limited to a single fixed height.
Limitations
- The leg range is not the finished tabletop height: the tabletop and mounting hardware add to the leg setting.
- More setup discipline: staff must record the chosen setting, lock all legs, level the table, and recheck it periodically.
- The range may not reach the required height: confirm the exact position chart, end settings, and step increments for the selected model before approval.
The supplier-provided planning specification lists a 37–60 cm leg range with 9 nominal height positions. Calculate the assembled tabletop height by adding the tabletop and mounting hardware to the leg setting.
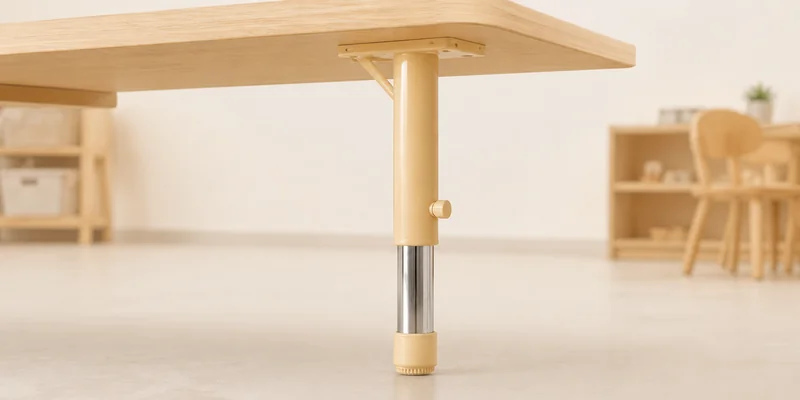
Your order record should show the locking method, whether tools are needed, the supplied feet or casters, and the finished floor-to-top height at the chosen setting. Set all legs away from children, lock them, and level the table before use.
Plan Quantities for a Mixed-Age Room
After choosing fixed or adjustable, plan quantities by room rather than buying one height for every child. For each room, assign quantities to a tested pairing rather than placing several chair sizes around one table. Trial children at the smaller and taller ends of the expected group, then use the results to set quantities and spares.
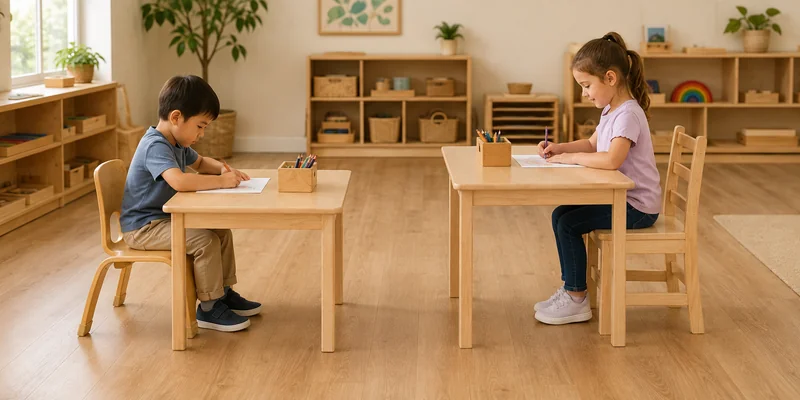
Quantity decisions need a room-level record:
- Count children by room label and main activity.
- Trial the smallest and largest children expected in that room.
- Test the complete table, chair, and any feeding accessory together.
- Assign each approved pairing to a room and record the quantity.
- Map the chair size to the table height on the purchase order.
Furniture also needs to fit the room. Use the preschool classroom layout guide to check occupied chairs, pull-out space, supervision sightlines, access to shelves, and circulation routes before finalizing quantities.
For room-level planning, review the Preschool and daycare furniture solution.
What Should You Confirm before Ordering?
With the room plan and quantities set, turn the shortlisted pairing into a purchasing specification. A useful specification lets a second person identify the exact set without guessing what “preschool size” means. Put the room, measurements, pairing, accessories, evidence, and delivery checks in one document.
For feeding-chair orders, add one complete-setup check. If a Nido, Infant, or Toddler chair will also be used for meals, confirm the chair size and configure the removable feeding tray, safety belt or harness, and foot or side supports as required. Record the seat height, seat depth, tray height, attachment points, and adjustment range in the order. A tray or belt can change how far the chair moves under the table, so test the complete setup before approval.
| Item to confirm | Details to verify |
|---|---|
| Intended room and users | Age range, number of children, and any individual access needs |
| Table | Model, shape, length, width, and finished floor-to-top height |
| Chair | Model, seat height, seat depth, width, and overall height separately |
| Pairing | Which chair size is assigned to each table height |
| Under-table space | Apron, drawer, crossbar, leg position, and usable clearance |
| Height mechanism | Fixed version or adjustable range, increments, and locking method |
| Base components | Supplied feet, floor glides, or casters and their effect on height |
| Approval evidence | Sample, dimensioned drawing, finish sample, and agreed product code |
| Delivery check | Quantity by size, assembly instructions, labels, and acceptance criteria |
Keep the supplier’s original unit in the approved order. If the drawing says 50 cm, record 50 cm rather than silently rounding it to 20 inches. The same unit should appear in the quotation, production file, and receiving check.
For a multi-room project, attach the floor plan, tested pairings, quantities, and approval evidence to the same purchasing file.
Three Approval Red Lines
Use these three red lines as a final document check before approval. They identify missing information that should be resolved before you commit to the order.
- No finished dimensions: the quote does not show finished tabletop height, chair seat height, and usable underside clearance.
- No adjustable evidence: the quote gives a range but no model-specific position chart, lock method, base components, or assembled height.
- No applicable safety documentation: the supplier cannot provide relevant test reports, certification documents, material and finish details, or compliance information required for the destination market or project specification.
Check Accessibility And Special Requirements
Document checks are not a substitute for accessibility review. Plan for the actual child, supportive seating, mobility device, and approach direction. Check clear floor space, footplates, armrests, knee and toe clearance, and access to the shared activity. A general preschool height chart cannot prove that a configuration is accessible.
For U.S. projects, check the U.S. Access Board’s provisions for accessible play tables and children’s reach ranges, then confirm which requirements apply to your project and jurisdiction.
FAQs about Preschool Table Height
Does Montessori Require A Special Table Height?
No. Montessori classrooms still need furniture matched to each child and activity. Choose a practical starting range, then check feet, knees, elbows, and usable clearance; floor work can reduce how many seated tables a room needs.
Can A Standing Table Replace A Seated Preschool Table?
No. A standing station can complement sensory or practical-life activities, but it does not replace a table-and-chair set for drawing, writing, meals, or longer seated tasks.
What If A Child Falls Outside The Usual Size Range?
Keep one size smaller and one size larger available, or use an adjustable table where it genuinely solves the mismatch. Recheck the complete pairing with the child rather than forcing an age label.
When Should A Classroom Recheck The Table And Chair Fit?
Recheck after a room change, a new chair or accessory, a height adjustment, or visible signs such as dangling feet, raised shoulders, leaning, or blocked knees. Record the approved pairing so staff can repeat the check.
Final Thoughts
Choose preschool table height only after the chair, activity, and clear underside pass the same check. For a room plan or matched furniture shortlist, contact TOP Montessoris with the dimensions you recorded.





 IT
IT  EN
EN  AR
AR  FR
FR  DE
DE  ES
ES  TH
TH  JA
JA  TR
TR